SHARE
Tips for Taking Better Photos with Your Phone
Have you ever wished you could take better photos with your phone?There’s a popular saying that “the best camera is the one you have with you.” I love my DSLR camera and my variety of lenses, but don’t always have it with me. Yet, I still want to be able to capture memories. That’s when I’ll use my iPhone. I’ve seen some incredible pictures captured by professionals and hobbyists alike with simple cell phones. Check out #iphonephotography on Instagram for some inspiration!
Here are my top 10 tips for taking better photos with your phone.
1. Start with a Clean Lens
Okay, this may sound obvious but you’d be surprised how grimy the camera lens on your cell phone can get from fingerprints and dust, which will make your photos look blurry Trust me. I’ve been there. It’s a good idea to regularly clean your phone’s camera lens gently using a microfiber cloth or other wipe for use with camera lenses. In a pinch, you can use your shirt.
2. Swipe Left To Get The Shot
This is a game changer. I can’t tell you how many times I’ve missed a shot frantically trying to unlock my phone and access the camera only to miss the moment. Did you know that you can instantly access the camera app on an iphone by swiping left, even when the phone is locked? Pretty cool, huh?
3. Control Light (Exposure)
Light is the most important aspect of a good photo and adjusting exposure can have an enormous impact on the image quality. I often see people post photos that look dark (underexposed). This happens when we let the camera control exposure. To adjust exposure (how much light enters your lens), tap the subject of your photo and a yellow sun icon will appear. Drag up on the sun to add exposure (light), or down to decrease exposure. Pay attention to how changes in exposure affect not just your subject, but the entire image, including a background.
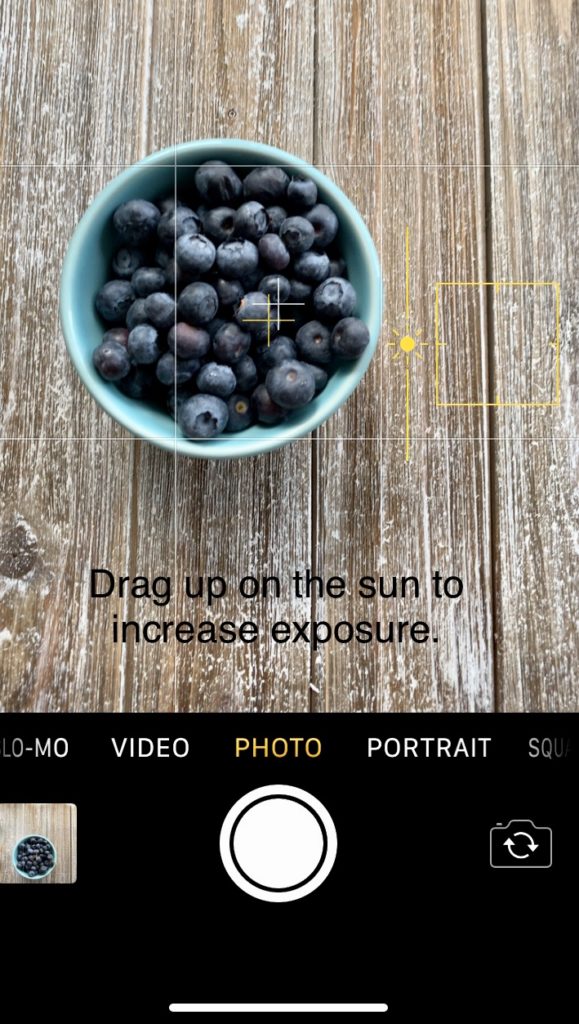
4. Tap the Box to Focus
Before you take a photo, be sure that your subject is in focus by tapping on the small box that appears on each of the faces in the photo. If you are focusing on a scene without people, tap over the part of the scene that you want in focus.

5. Freeze Movement with Burst Mode
For fast moving subjects (like kids running or playing sports), burst mode is a lifesaver. Burst mode is an iPhone camera setting that lets you take ten photos per second. If you have an iPhone with iOS 14 or later, you can use the volume up button to act as a Burst Mode shutter button. You will first need to activate that setting as follows:
- Go to the Settings app on your iPhone
- Swipe down and tap Camera
- Tap the toggle next to Use Volume Up for Burst
6. Be Mindful of Your Background and Distractions
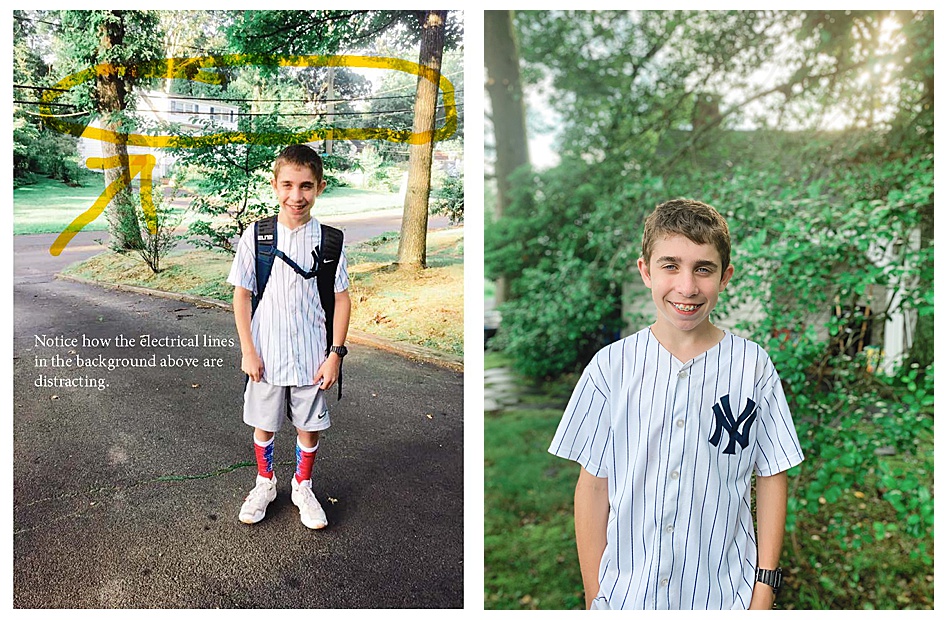
Any easy way to transform snapshots into more polished photos is to be more intentional about what you allow in your frame. Before you take a photo, scan the edges of your frame for distracting elements like tree limbs poking out above a person’s head. Notice if there are objects in the background or foreground that compete for attention with your subject. Sometimes just shifting your perspective will easily eliminate elements that don’t add to your image. Below (left), is a photo of my son on his last day of 6th grade. In the first shot you can see the electrical wires hanging above in the background and my neighbor’s house.
In the next image, I moved my son in front of some greenery and stepped in closer to capture him with fewer distracting elements. I also asked him to take his backpack off for the shot.
7. Change Your Perspective
Shooting from different angles, such as below or above your subject, will give your images a more creative feel and allow you to isolate your subject against a simple sky in the background. This is a great way to eliminate distracting elements that would otherwise detract from your photo.
In the example below, I got down on the ground and shot up at the flowers to highlight just the colorful petals against the blue sky.

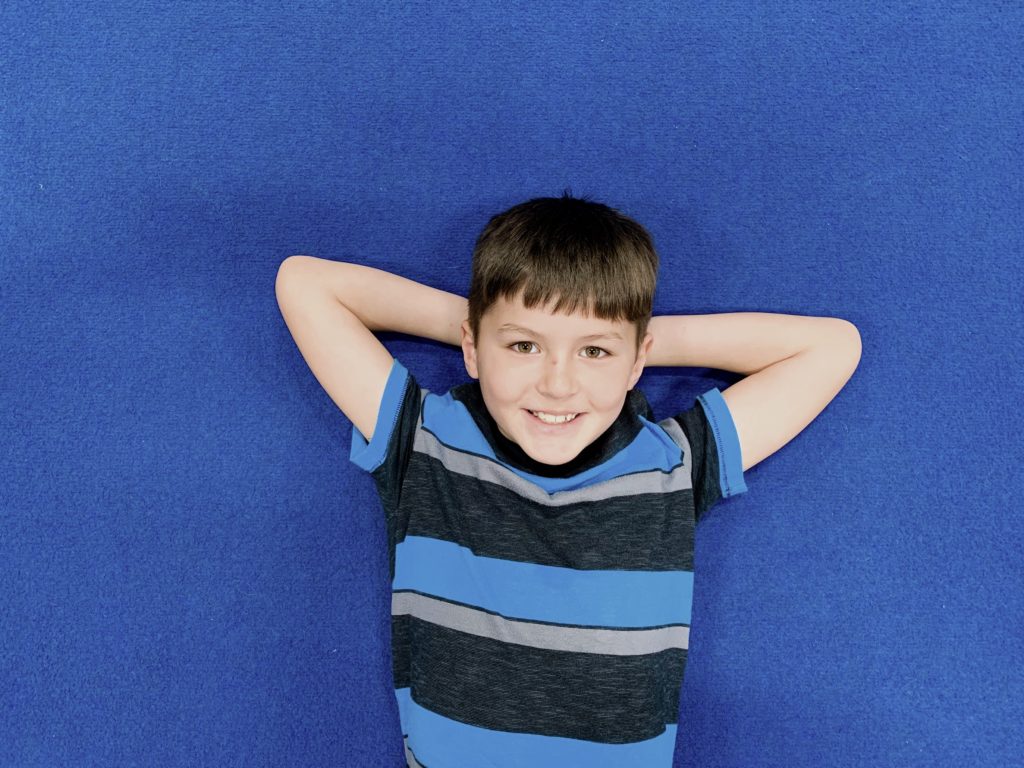
In the image below, I stood over my nephew who was laying on the floor and shot straight down.
And, in this image, I was in a glass enclosed ferris wheel with my family and shot down on the beach below.

Here’s another image shot from above.

8. Move Closer
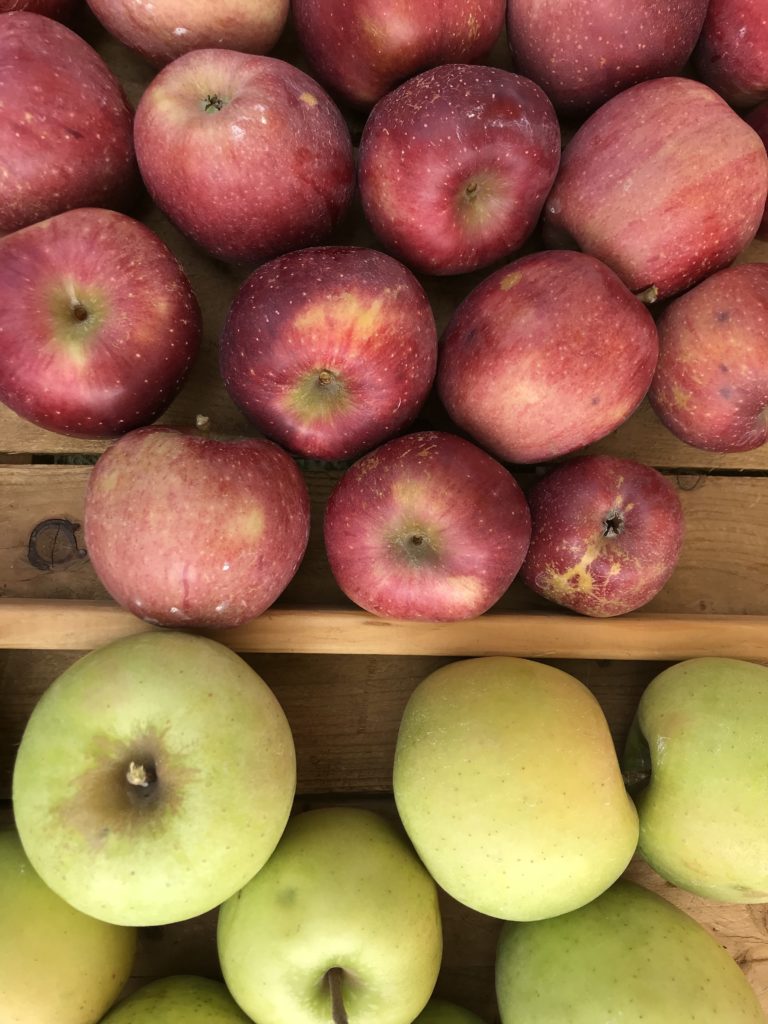
Create greater impact by moving closer and filling your frame with your subject. This draws the viewer to your subject and ensures your subject doesn’t get lost in the surroundings. This is a good tactic when shooting both portraits as well as details like flowers or other subjects that you want to stand out from their environment.
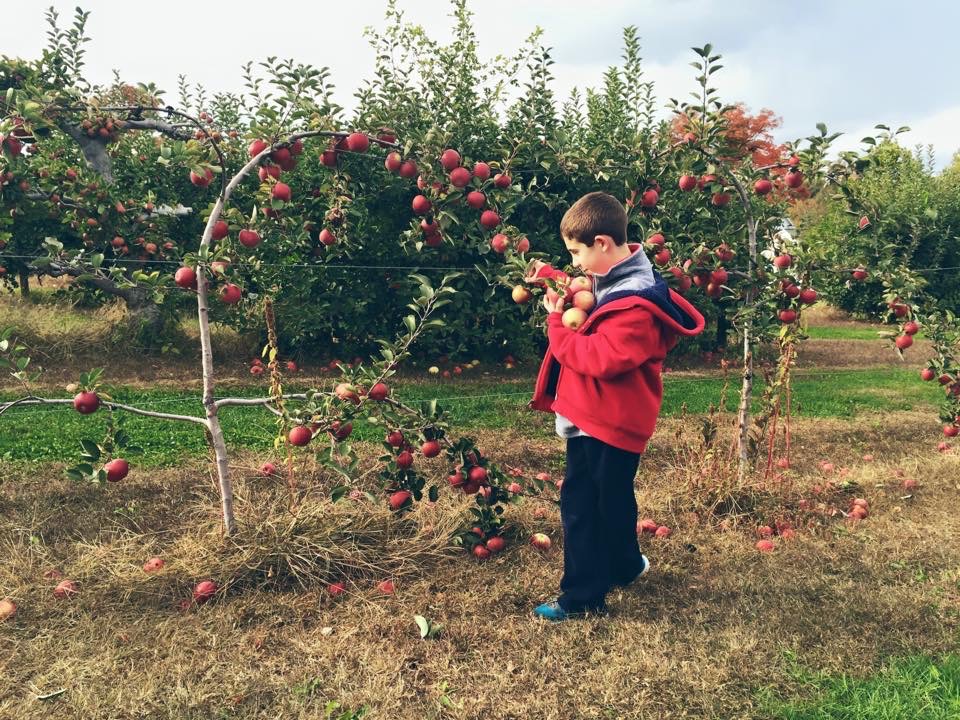
In the image of the apples, I moved in really close and shot down on them so that the apples filled my frame.
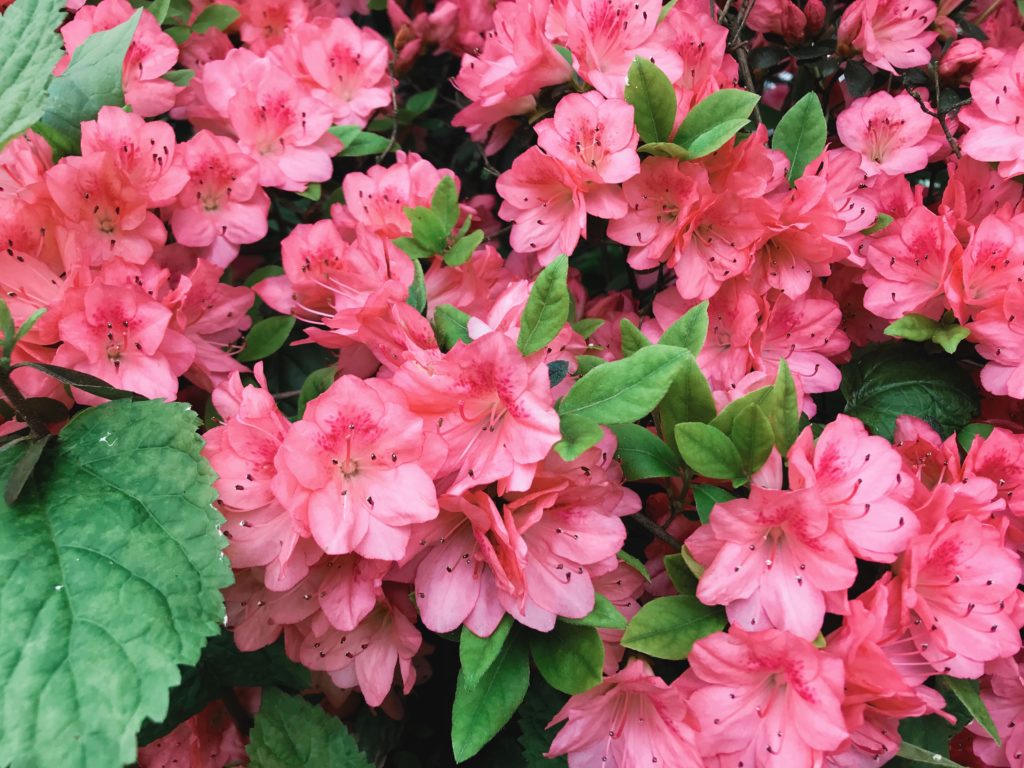
I did the same for the flowers.

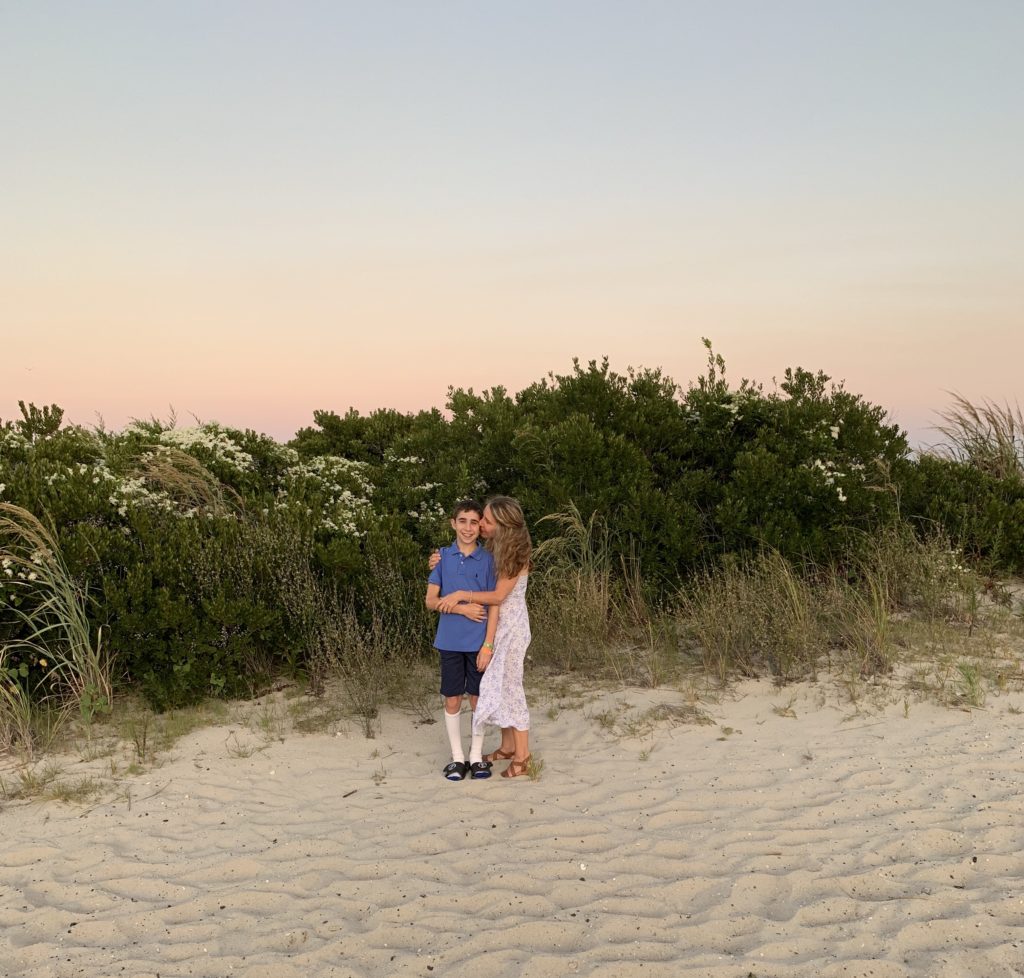
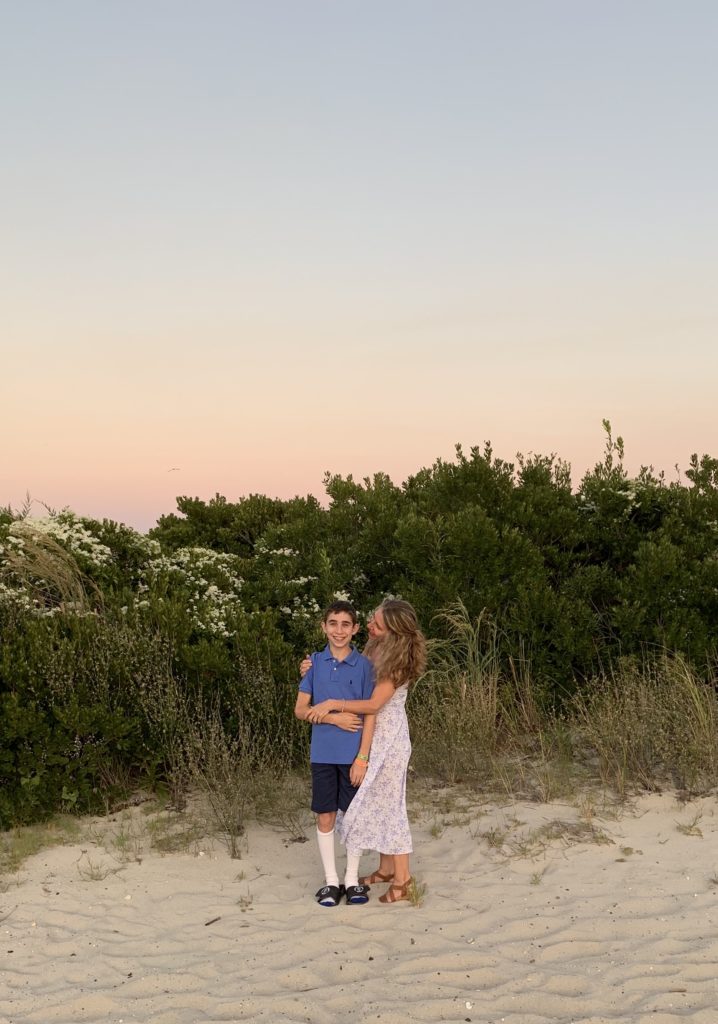
Notice in the image below I asked my husband to take of my son and I that we get a bit lost in our environment because he was standing so far from us. There’s nothing wrong with that image but I really wanted the main subject of the photo to be my son and I and the pretty sunset and dunes to be secondary to the story. In the second image, I asked my husband to move closer to us and take the photo. Do you see how in that image your eye goes right to my son and I first before taking in the scenery?
9. Vary Your Composition, Use the Rule of Thirds and Leading Lines
Composition is a powerful tool for taking great images whether it’s with your Iphone or a DSLR.
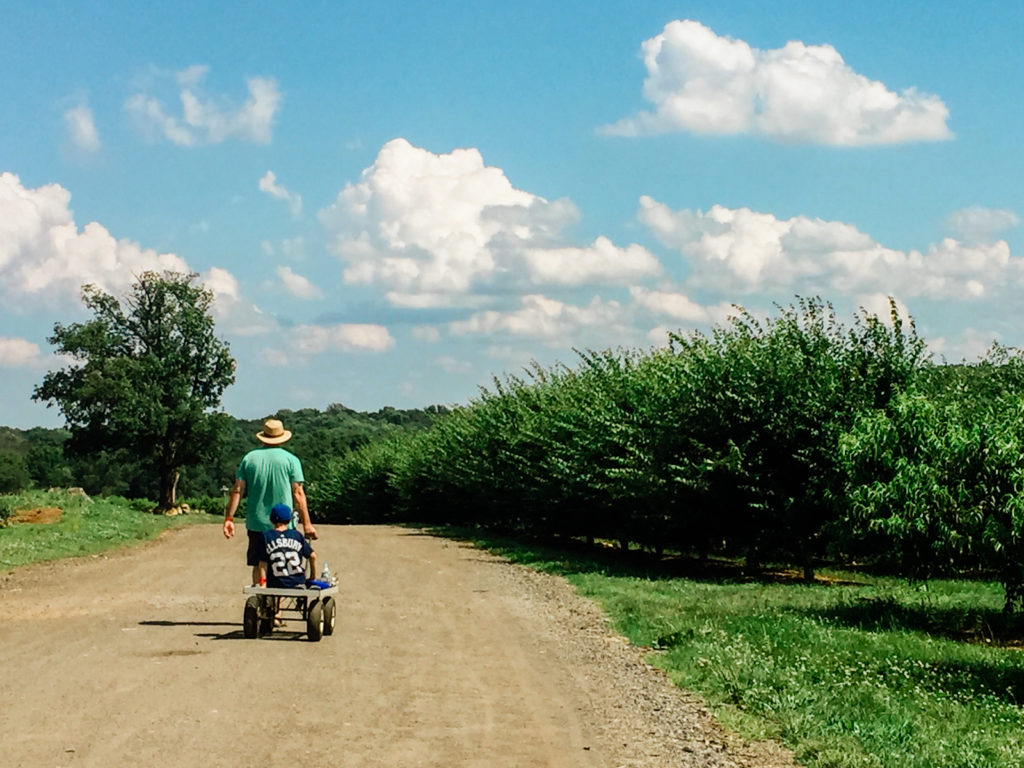
There’s nothing wrong with centering your subject in your photos. This works especially well for portraits, but varying your composition will add visual interest to your photos. The Rule of Thirds is a great compositional tool to try and involves placing important elements in your photo along intersecting points in a 3×3 grid, which equally divides the image into nine parts. This concept can be applied to any genre of photography, whether photographing people or landscape for example.
Activate the grid on your phone to help compose your shot
When taking a portrait, place your subject’s eyes so that they align with the rule of thirds; this will draw the viewer immediately to her eyes. When photographing landscapes, place the horizon along the top third of the frame according to the Rule of Thirds to make your image stronger.
Here are some examples showing the rule of thirds.

TIP:
A handy feature found on most phones is the ability to display the Rule of Thirds gridlines. On the iPhone you can switch the gridlines on by going to Settings > Photos & Camera > Grid to turn on.
And here’s an example of leading lines.
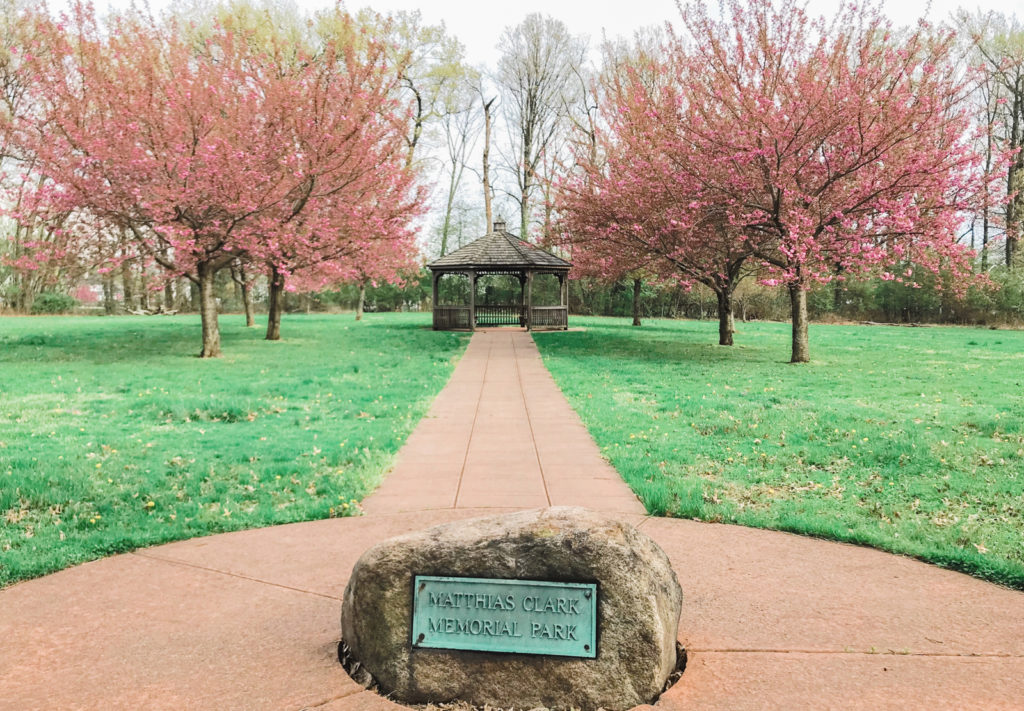
Here’s an example showing both leading lines and the rule of thirds. See how the wood fence draws your eye to the subject, who is placed just slightly to the left of the [imaginary] rule of thirds.

10. Frame Your Subject
Placing your subject between natural elements or structures that frame them will really draw the viewer’s eye into the image and give it a greater depth.
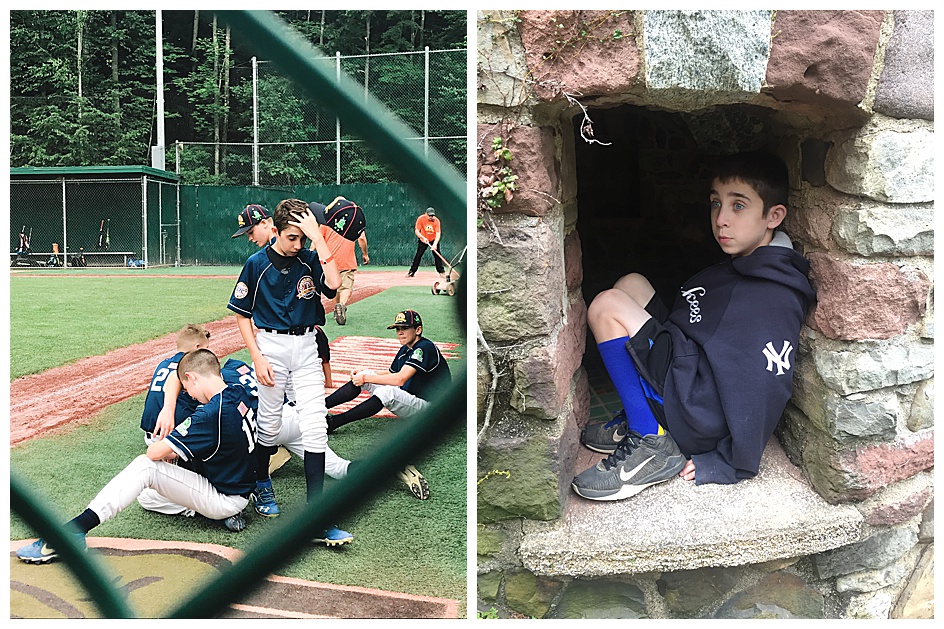
In the example below on the left, I used the fencing to frame my son as he turned around in the middle of his teammates stretching, and on the right, I had my son sit in a window framed by stones.
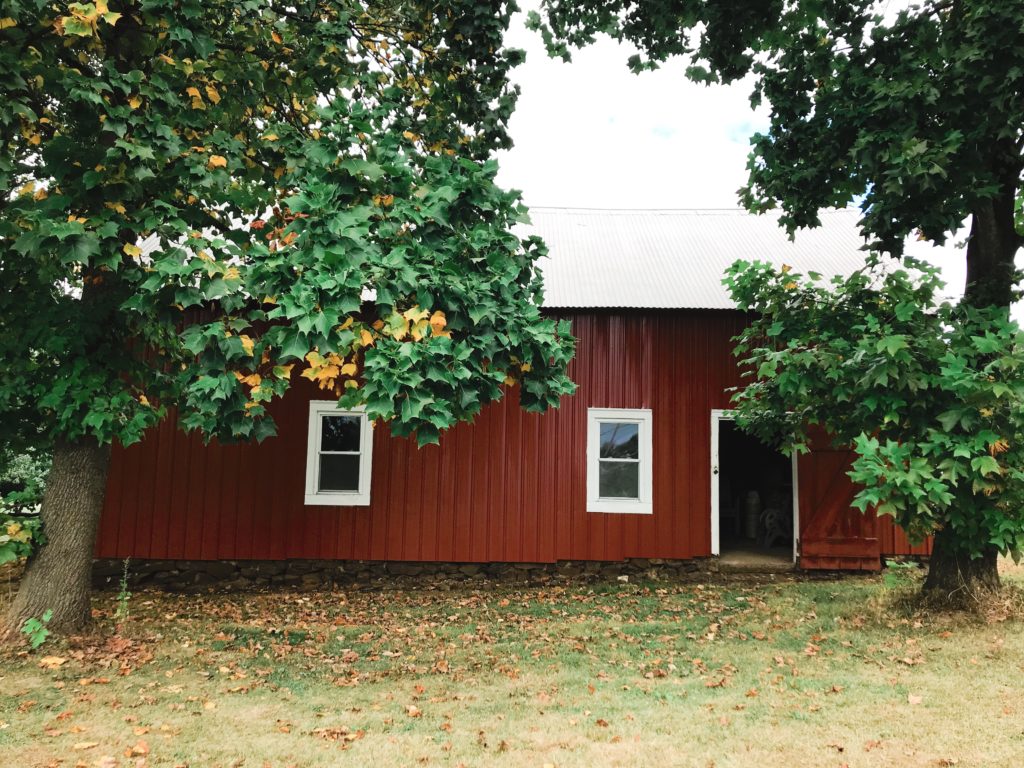
In the image of the red barn, I used the tree foliage on either side to frame the building.
Here’s a more subtle example of framing. Notice how the painted baseball diamond (lines and circle) frame my son and keep him from being lost in the background.

Bonus Tips
Look for interesting reflections or silhouettes.


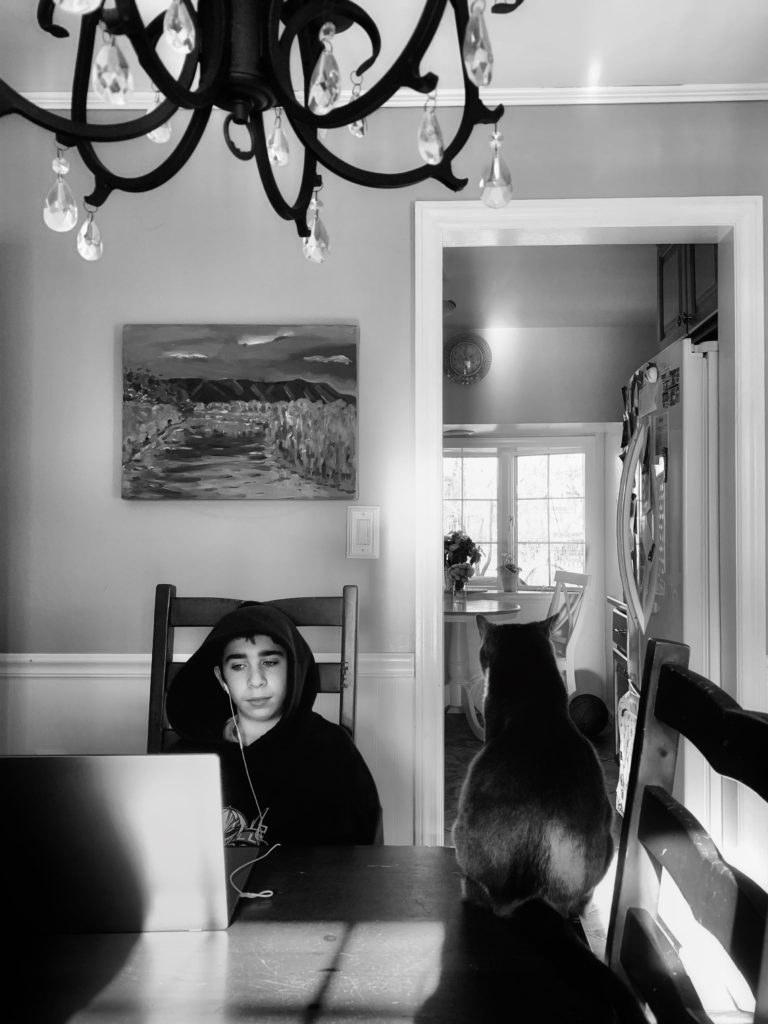
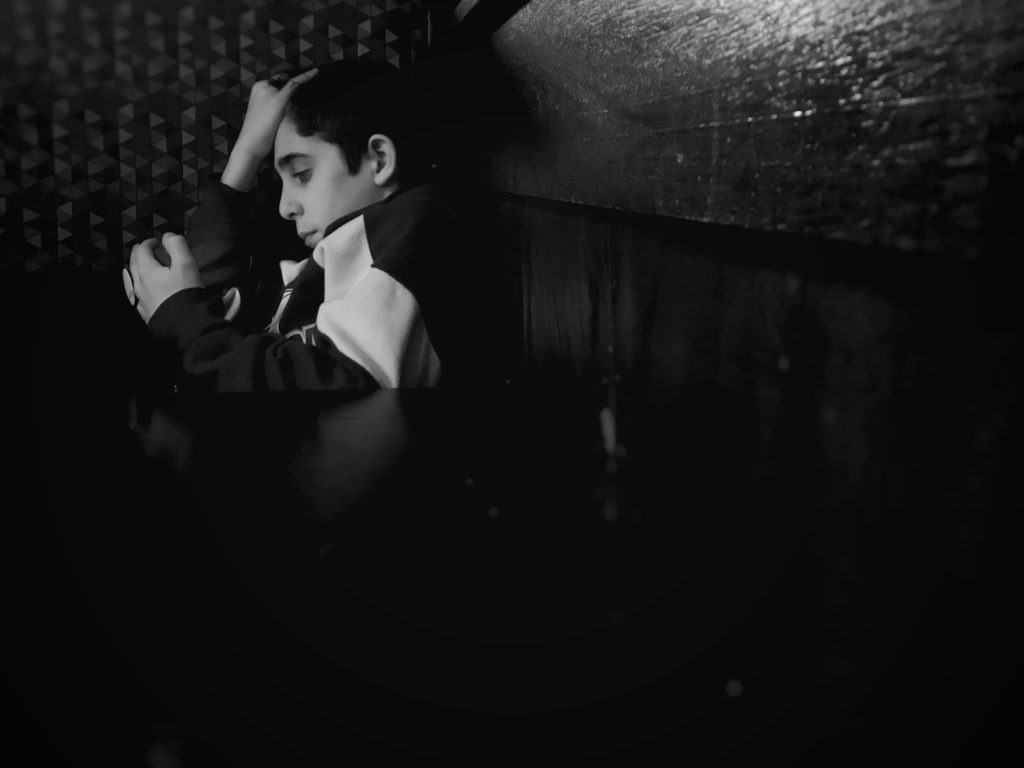
Consider shooting in monochrome to for tricky indoor lighting.
Indoor lighting can be especially challenging when shooting with your phone. Tungsten lightbulbs and almost any wall colors besides white can create unattractive color casts. When I shoot inside my home, I often convert my image to black and white. But, to get the best results, I know I need to ensure that my subject is well lit. In the image below, my son was sitting at our dining room table for virtual school. As you can see from the bright highlights falling on our table, he was facing the windows so his face was well lit.
In the example below, we were in a restaurant a couple years ago and had finished dinner. My son was looking at his phone and playing with his hair, which he’s done since he was a baby whenever he’s tired. Although the lighting wasn’t ideal, I knew I wanted to capture the moment as a reminder that even though he was growing up, there were still glimpses of the little boy inside. Since the background of the booth was a busy, bright colored pattern and there was a strong color cast from the lighting, I decided I would shoot the image as a black and white.
Follow these tips for print worthy photos and stay tuned for my upcoming post: Simple Steps for Editing Your iPhone Pictures.
(Note: All images shot with an iPhone 7)
And make sure you print your favorite Iphone images. Wondering where to print your pictures? Read my Top Picks for Where to Print Your Photos.
Did you find my tips for taking better photos with your phone helpful? I’d love to hear from you in the comments below.
Want More Tips for Taking Better Photos of your Kids and Family? Sign up to get a FREE PDF guide emailed to your mailbox. Enter your email here.
xo,


Leave a Reply Cancel reply
Thank You for signing up!
You'll be added to my newsletter list.
Please add my email address to your contacts to ensure you don't miss a thing!
Winner of the Westfield Area Most Loved Family Photographer award by Hulafrog two years in a row, Debbie Camba Photography is a New Jersey Family Photographer based in Scotch Plains. She specializes in capturing candid and meaningful moments that reflect the love and wonder of childhood and family life.
Debbie photographs families outdoors and in homes throughout Scotch Plains, Westfield, Mountainside, Cranford, Summit, Basking Ridge and the surrounding area, including Somerset County, Morris County and Middlesex County. She is available in other locations upon request.
Debbie was awarded Master Photographer Certifications by the National Association of Professional Child Photographers (NAPCP) for demonstrating excellence in the craft of child and family photography.
about debbie...
Heartfelt Images that Capture Your Family's Love, Laughter & Connections...
Copyright 2024 - Debbie Camba Photography | New Jersey Family Photographer | 908-858-2068
SAY HELLO!